DOUGLAS Skincare Campaign
PROJECT DETAILS
CRAFTING THE LIGHT
BEFORE AND AFTER
Transformation made visible.
TOOLS
Equipment List
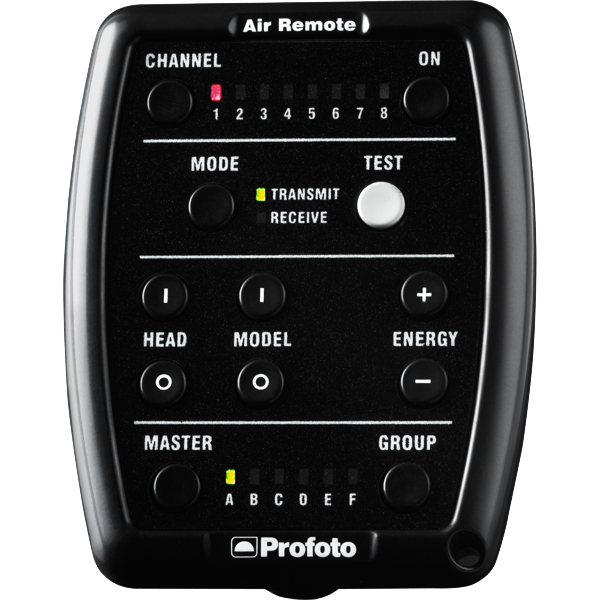
Profoto Air Remote
A wireless transmitter that mounts on the camera’s hot shoe to control Profoto lights remotely. Supports TTL, manual power adjustment, and high-speed sync. Why it’s used: Enables precise, cable-free control of flash settings from the camera position, streamlining workflow and allowing quick lighting adjustments during a shoot.
A wireless transmitter that mounts on the camera’s hot shoe to control Profoto lights remotely. Supports TTL, manual power adjustment, and high-speed sync. Why it’s used: Enables precise, cable-free control of flash settings from the camera position, streamlining workflow and allowing quick lighting adjustments during a shoot.
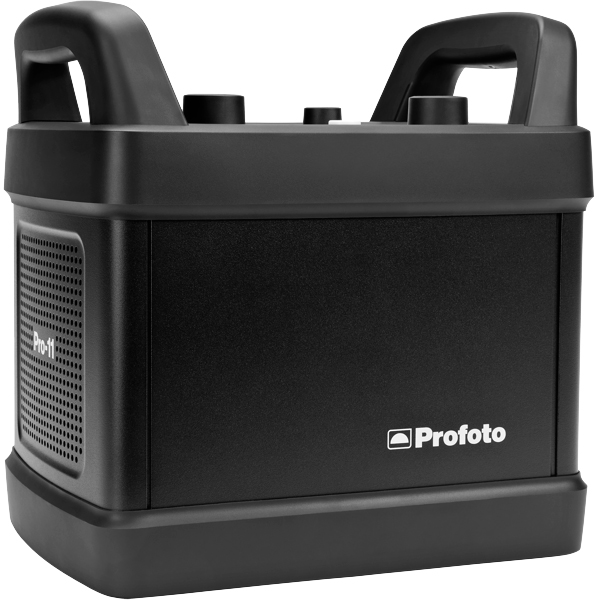
Profoto Pro 11
A top-tier 2400 Ws studio generator offering ultra-fast flash durations, short recycle times, and exceptional color consistency. Features wireless control and AirX connectivity for remote operation.
Why it’s used: Delivers unmatched speed, power, and reliability for high-end fashion, beauty, and commercial shoots where precision and performance are critical.
Profoto ProHead
A high-performance flash head designed for use with Profoto’s Pro-series generators. Built for durability, fast recycling, and consistent color output, even at high power.
Why it’s used: Delivers powerful, reliable lighting for demanding studio and location work, supporting a wide range of Profoto modifiers for maximum creative control.
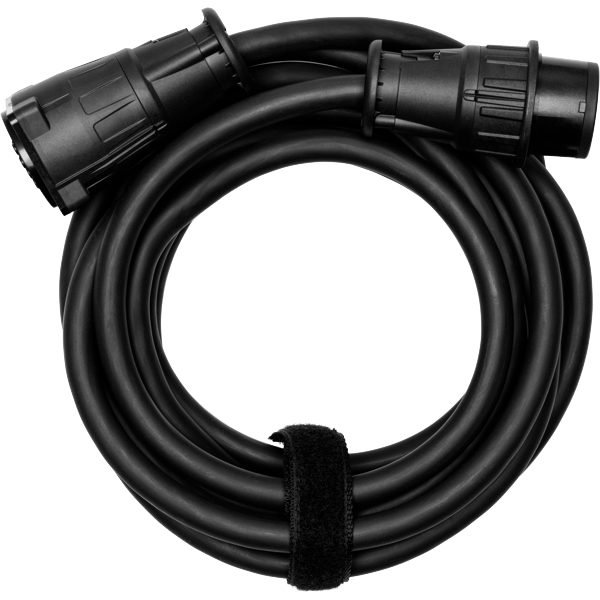
Profoto Extension Cable
A heavy-duty cable that extends the distance between a Profoto generator and its flash head. Designed to handle high power loads without loss of performance.
Why it’s used: Provides flexibility in light placement on large sets or challenging locations, allowing equipment to be positioned safely and creatively without being limited by generator proximity.
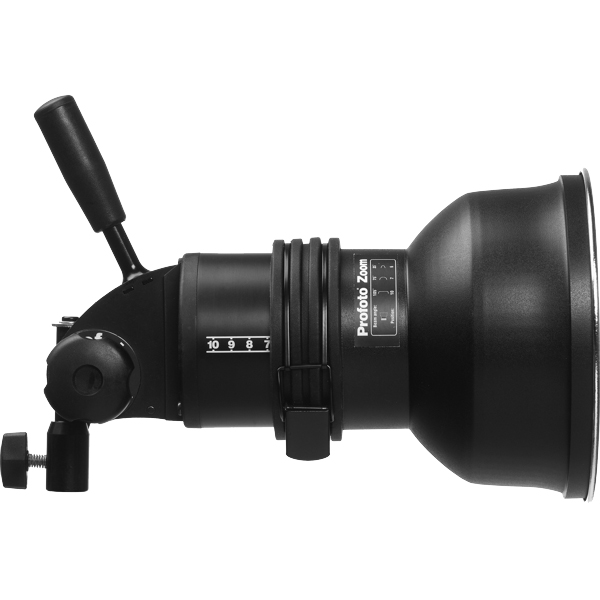
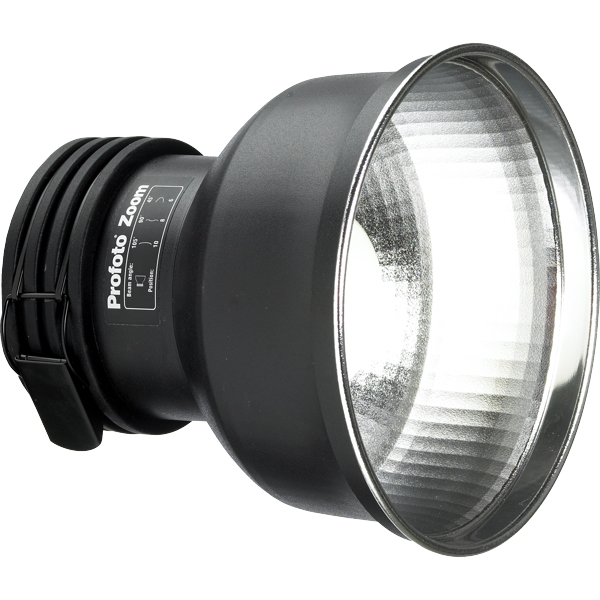
Profoto Zoom Reflector
A versatile hard light modifier for Profoto flash heads, featuring an adjustable zoom function to change the beam spread from wide to focused.
Why it’s used: Provides crisp, punchy light with controllable spread, making it suitable for everything from general illumination to accent lighting in both studio and location work.
Profoto Umbrella Shallow White M
A medium-sized, shallow-profile umbrella with a white interior for soft, even light. Designed for quick setup and portability.
Why it’s used: Produces a flattering, diffused light with gentle contrast, ideal for portraits, beauty, and fashion shoots where a natural, soft look is desired.
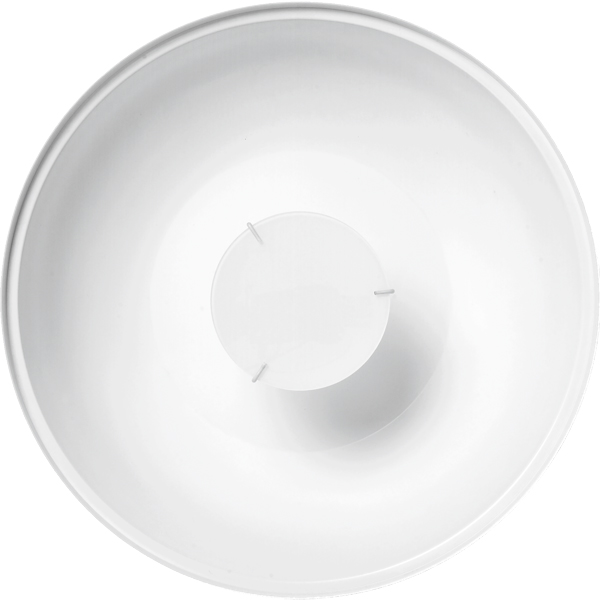
Profoto Softlight Reflector White (Beauty Dish)
A 65 cm white beauty dish designed for Profoto flash heads, producing a unique mix of soft, even light with a hint of crispness. The white interior offers a more gentle, flattering quality than silver versions.
Why it’s used: A go-to for fashion and beauty photography, delivering smooth skin tones, natural-looking highlights, and round catchlights while maintaining detail and shape.
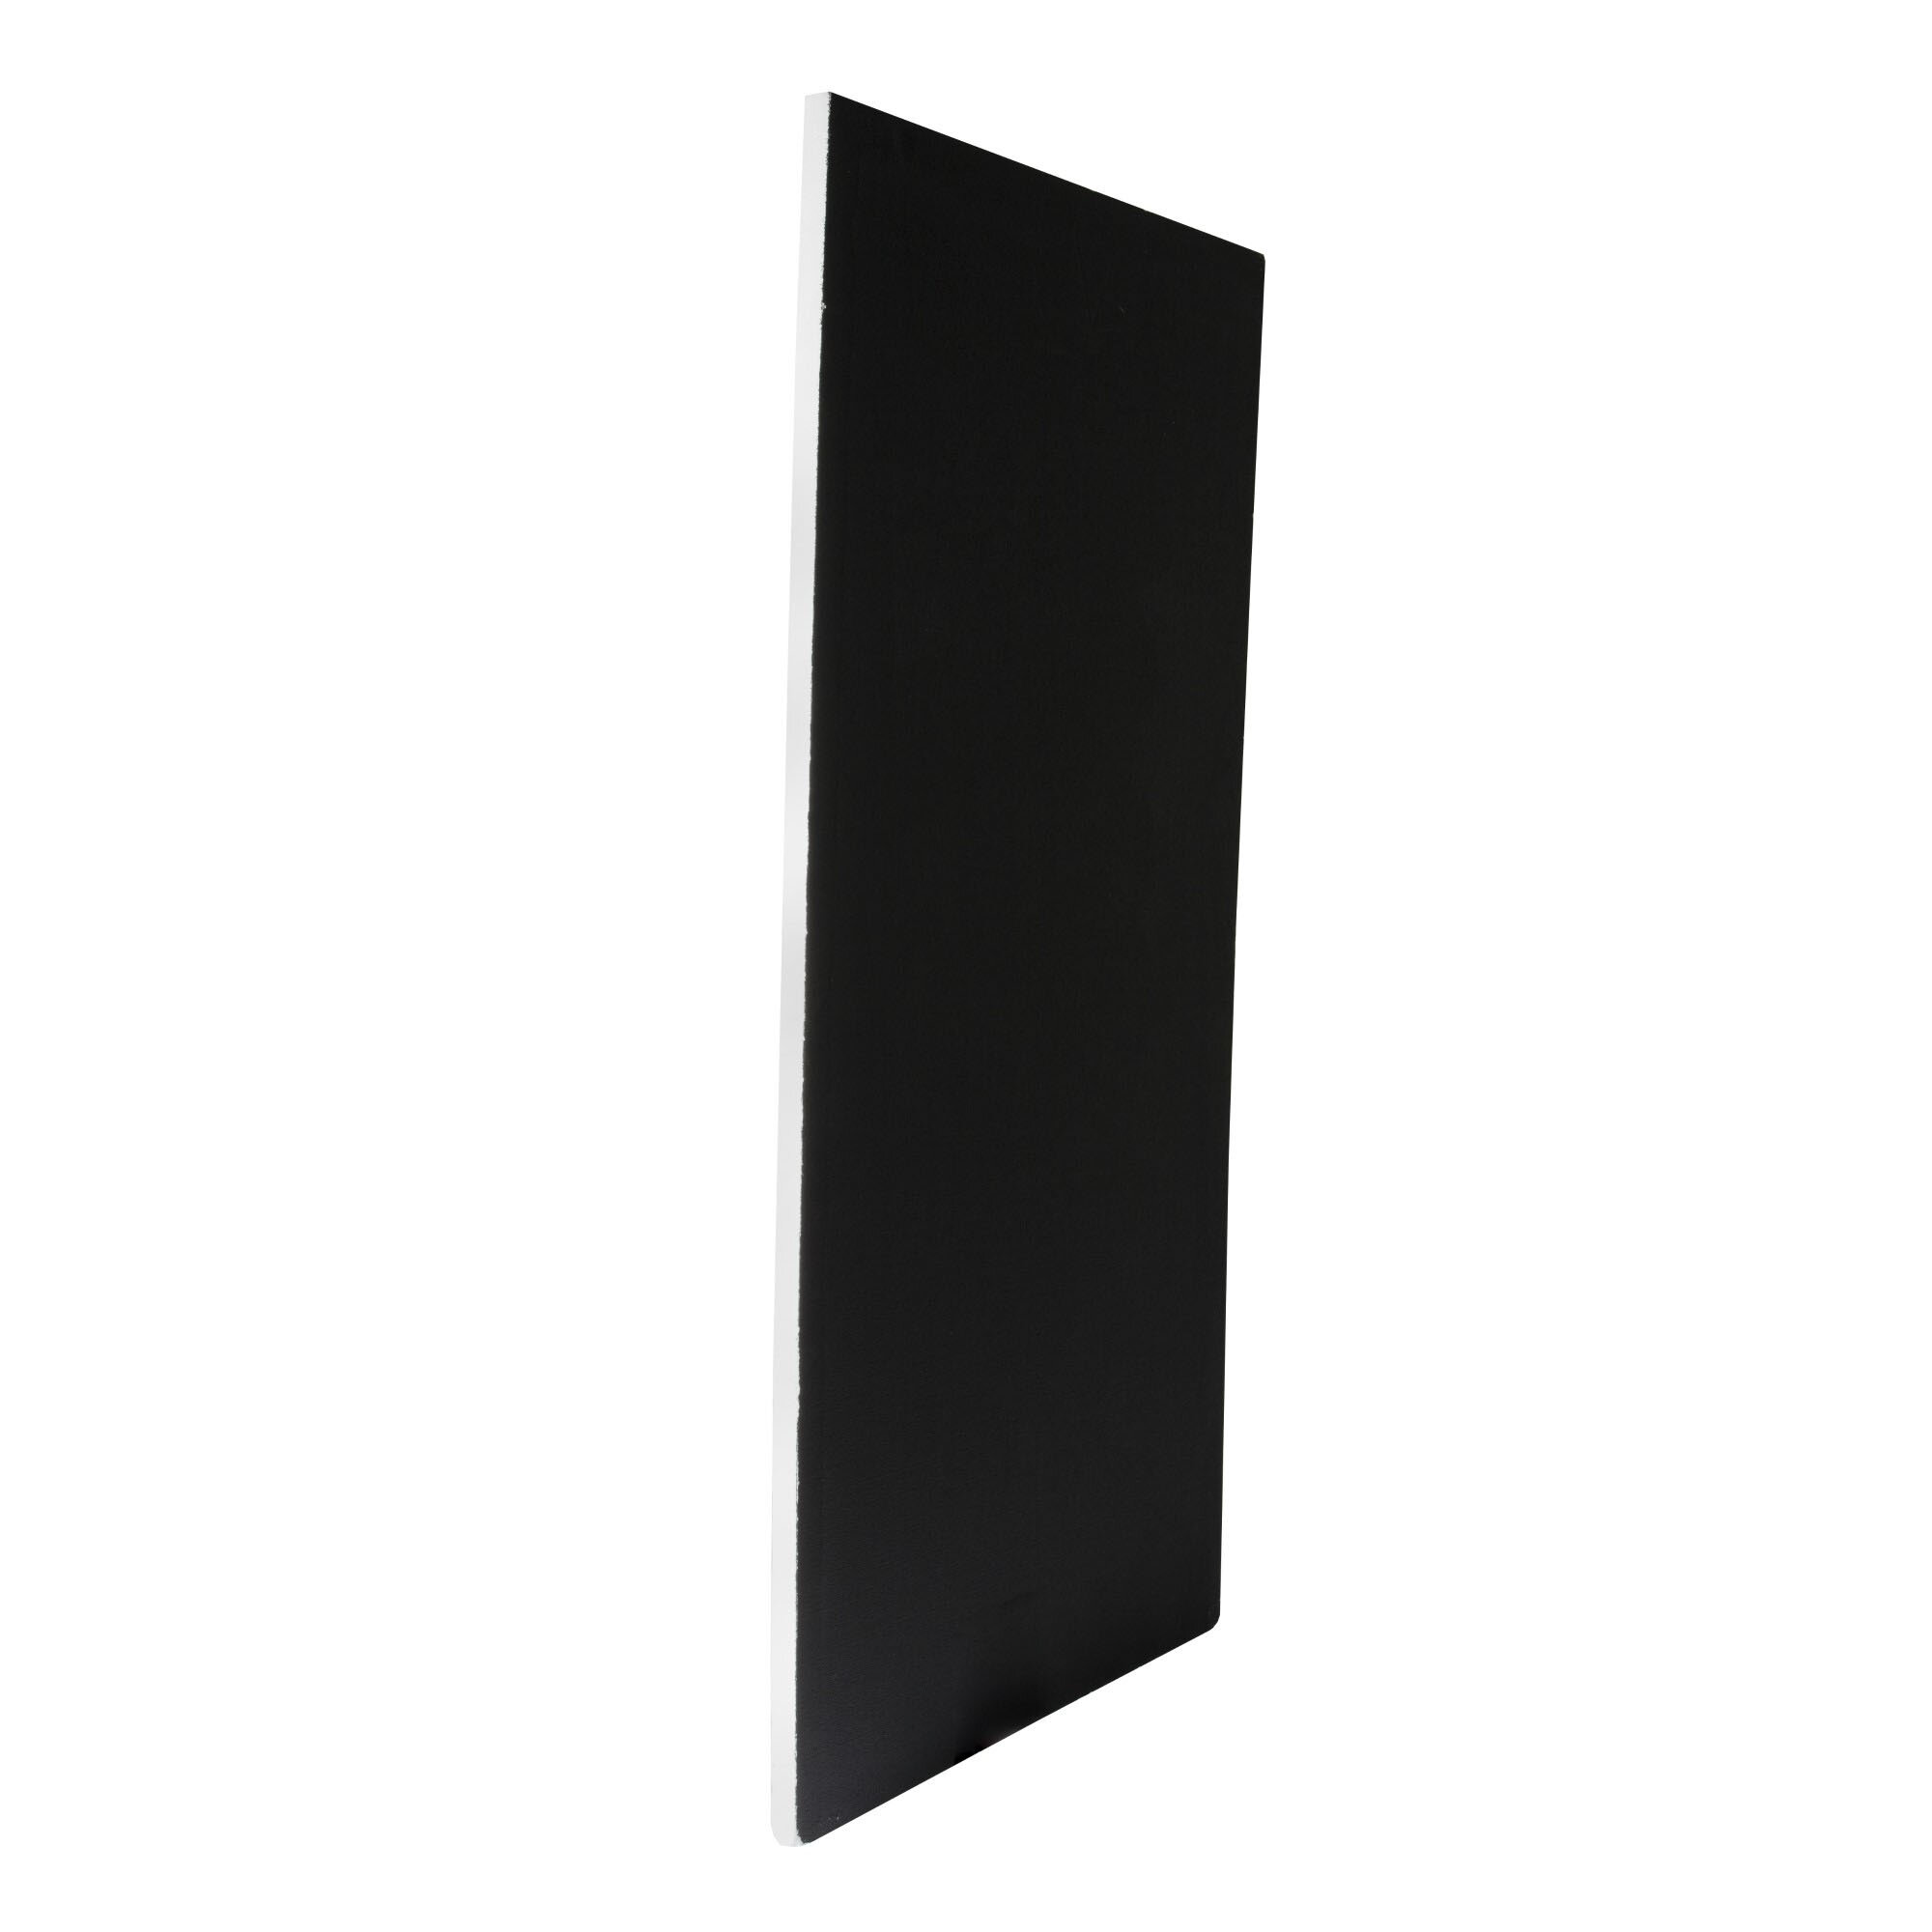
Poly Board Black Large
A large, rigid panel made from black foam core or similar material, used to block or absorb light. Typically lightweight but sturdy enough for repeated use on set.
Why it’s used: Reduces light spill, deepens shadows, and increases contrast by preventing unwanted reflections. Commonly used in pairs to create controlled, moody lighting setups.
Poly Board White Small
A small, rigid panel made from white foam core or similar material, used to reflect light. Lightweight and easy to position around the set.
Why it’s used: Bounces light back onto the subject to fill in shadows, soften contrast, and create a more even, flattering illumination.
A small, rigid panel made from white foam core or similar material, used to reflect light. Lightweight and easy to position around the set.
Why it’s used: Bounces light back onto the subject to fill in shadows, soften contrast, and create a more even, flattering illumination.
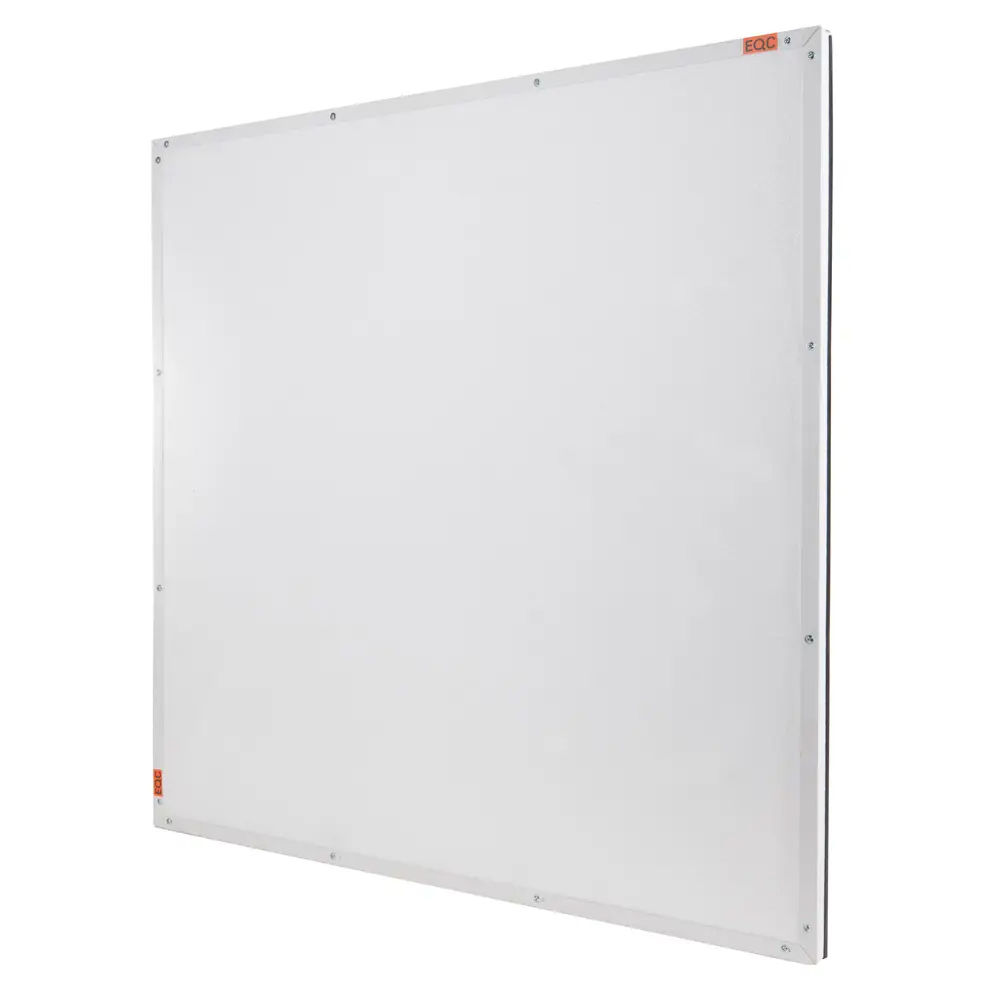
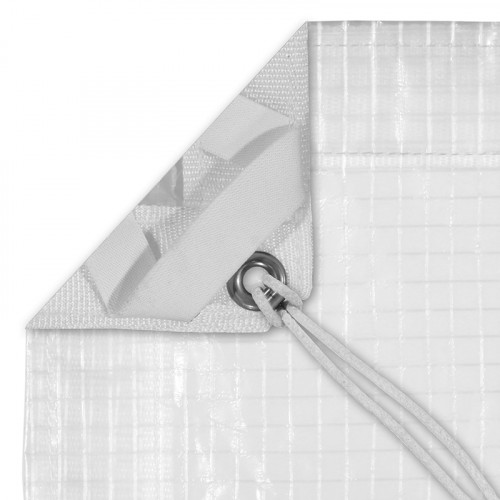
Grid Cloth
A durable, reinforced fabric with an embedded grid pattern, available in various densities from full to half-stop diffusion. Often mounted on frames or used as large overheads.
Why it’s used: Softens and spreads light while maintaining directional control, making it ideal for creating smooth, even illumination without excessive light spill.
Get your full EQ list here

Project Intro
The goal of this setup is to create a punchy, glowy beauty light that works very well for commercial shoots as well as beauty editorials. Let`s dive in!
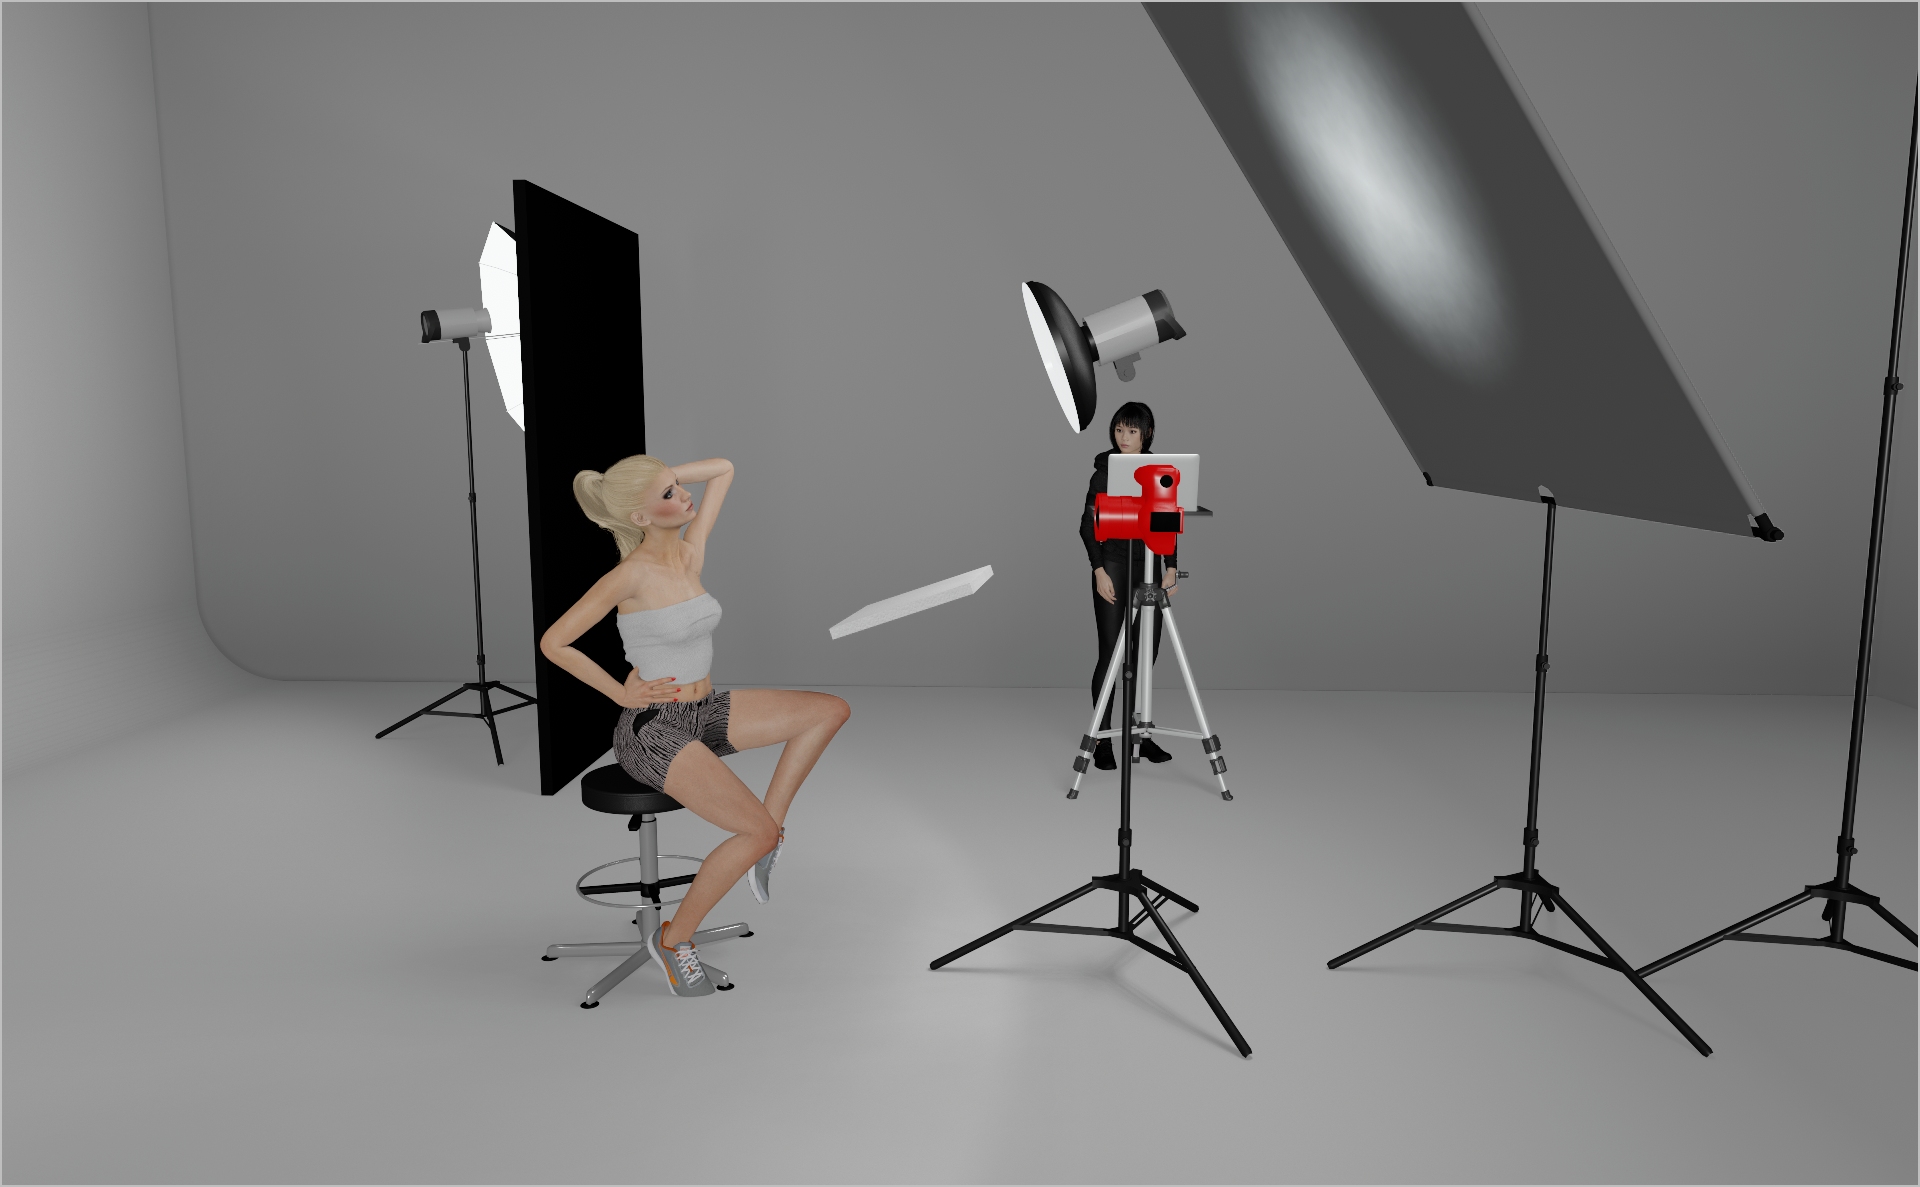
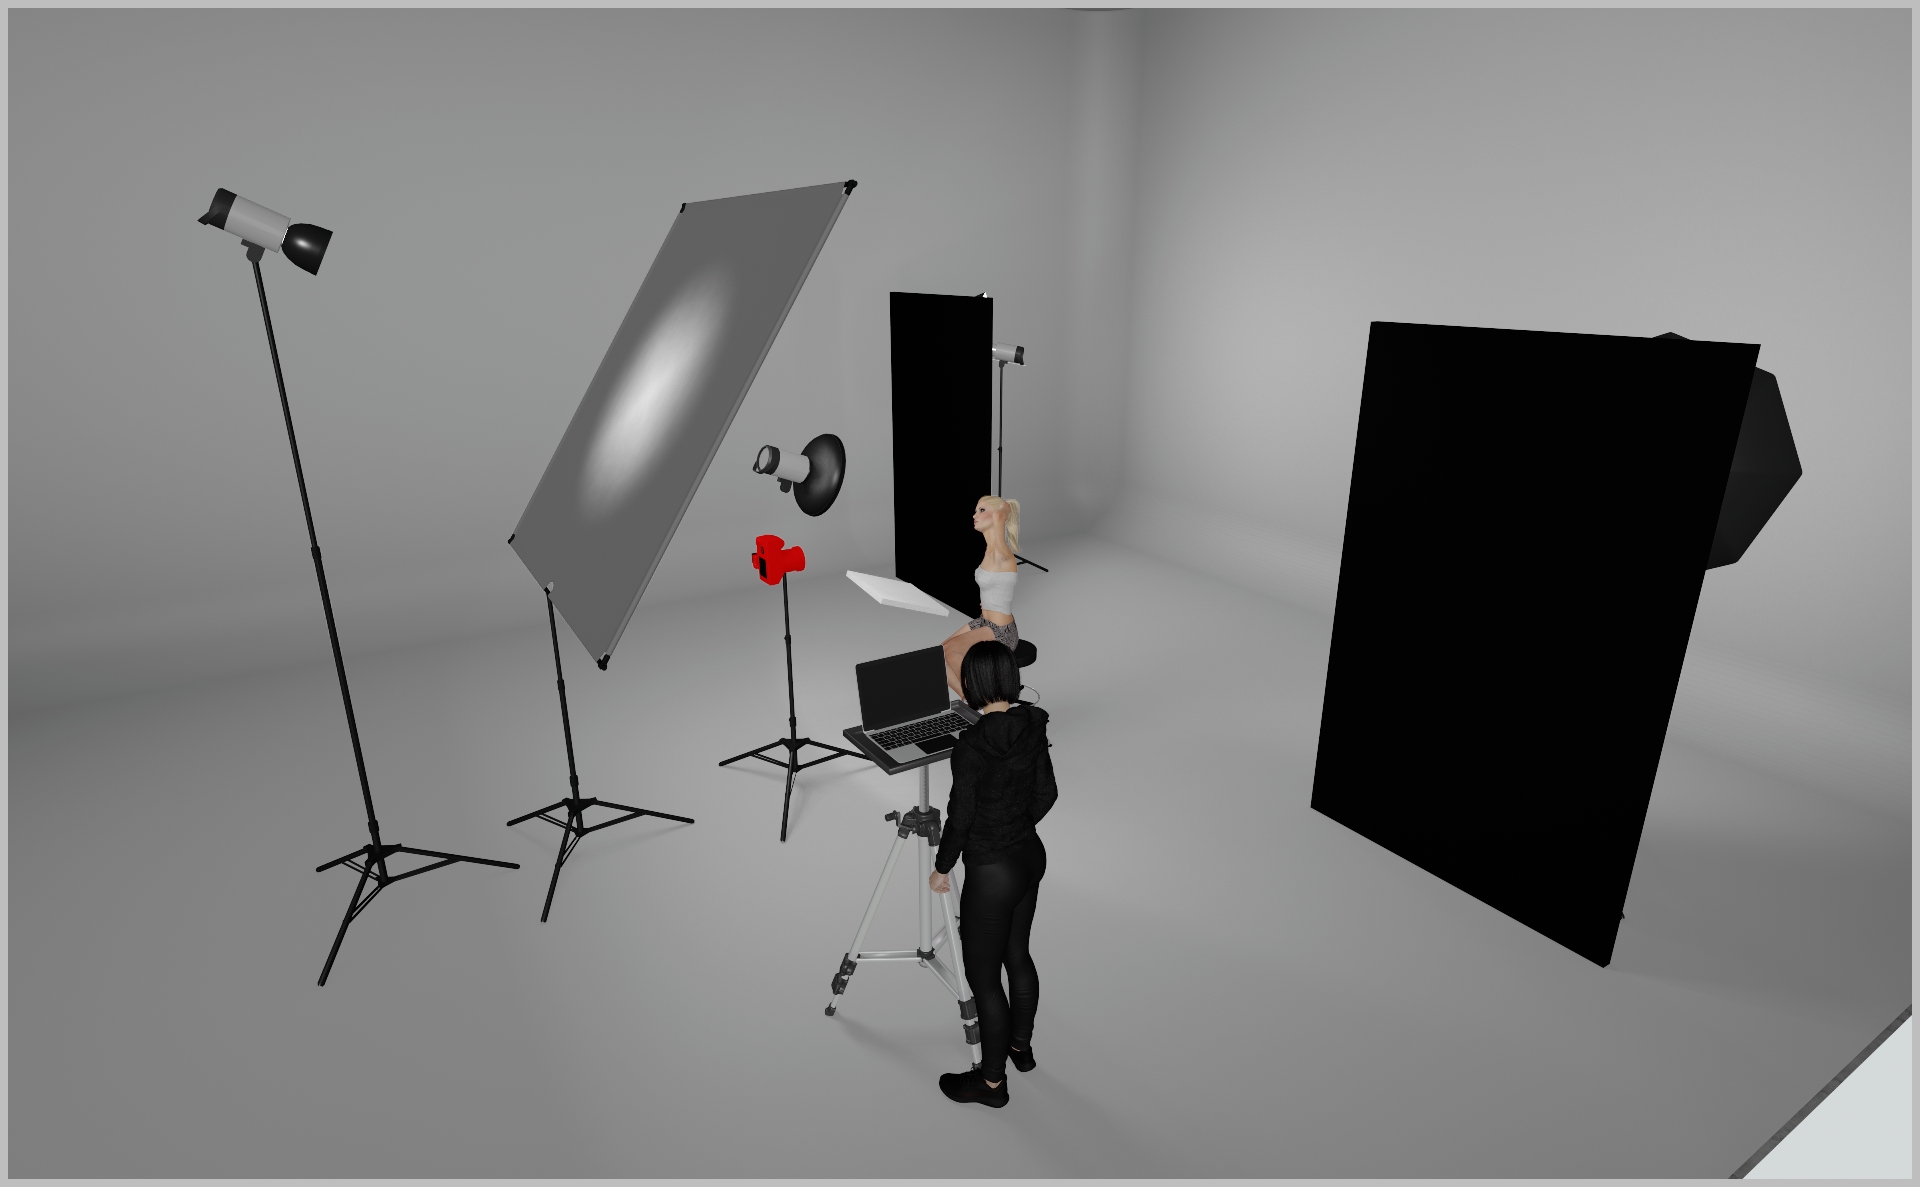
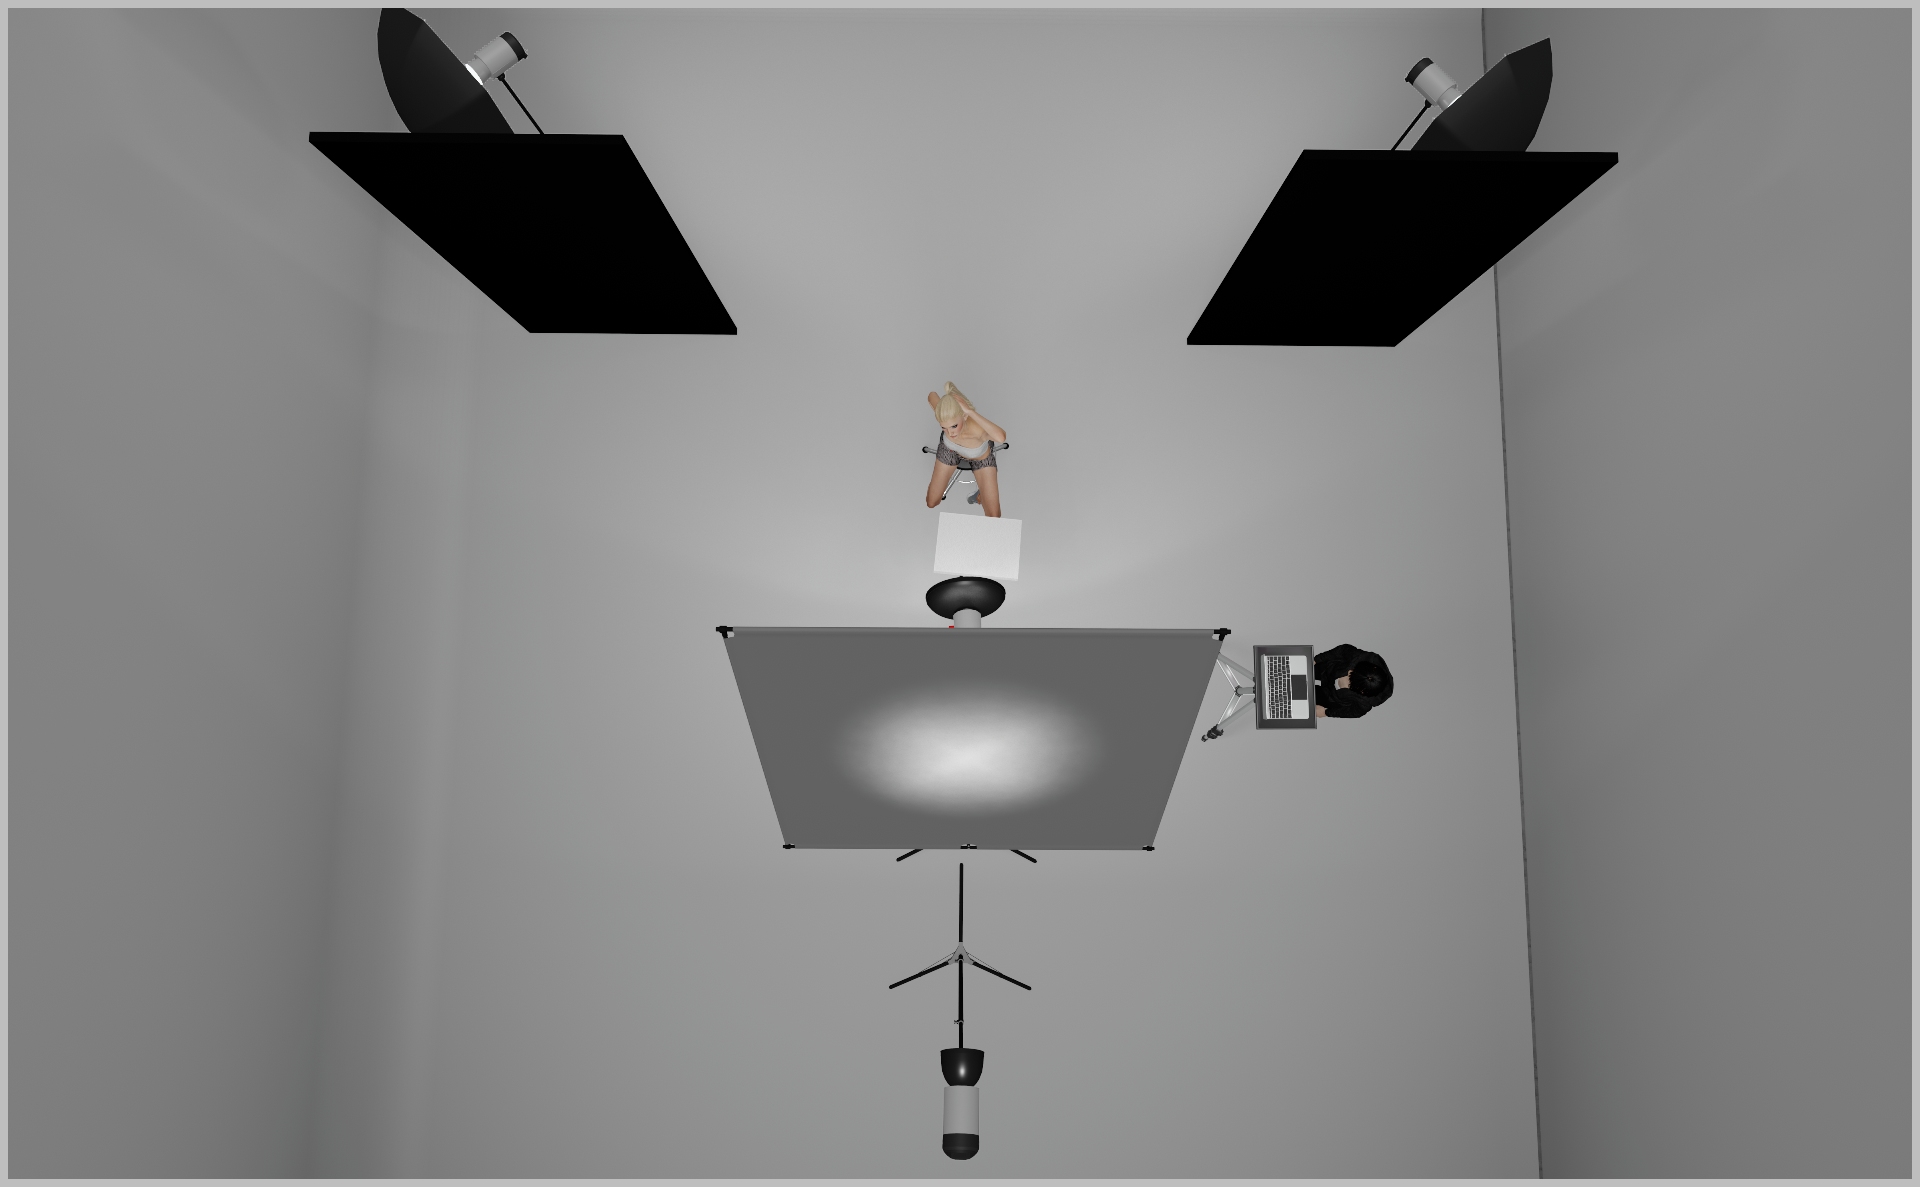
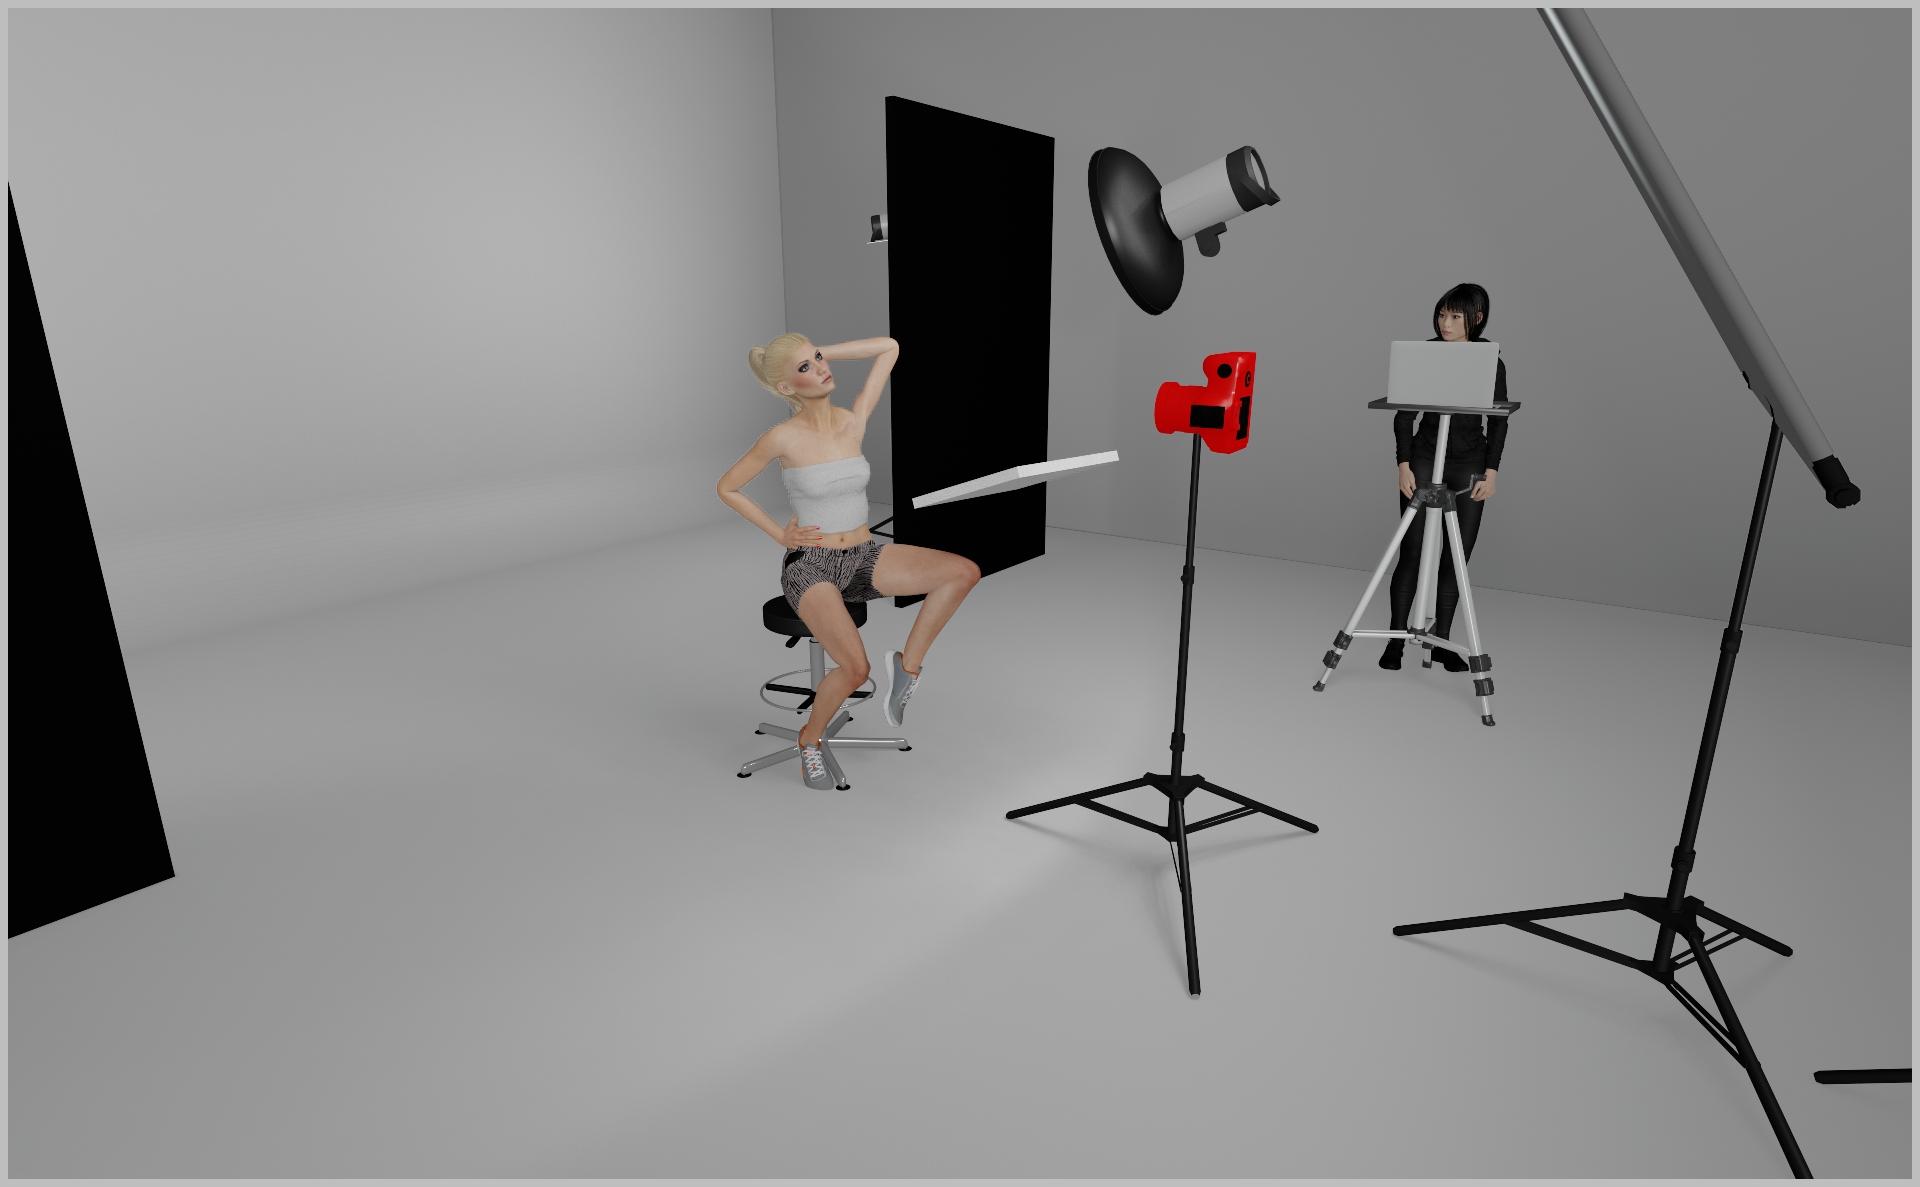
STEP 1
- Mount your Beauty Dish (Profoto Softlight Reflector White) above the camera.
- Tilt it roughly 40° down toward the model for that signature beauty-light look—smooth midtones, crisp highlights. This is your key-light.
- Add a small white polyboard under the model’s chin to soften any harsh shadows.
- Start at power 6.0 and tweak to taste.
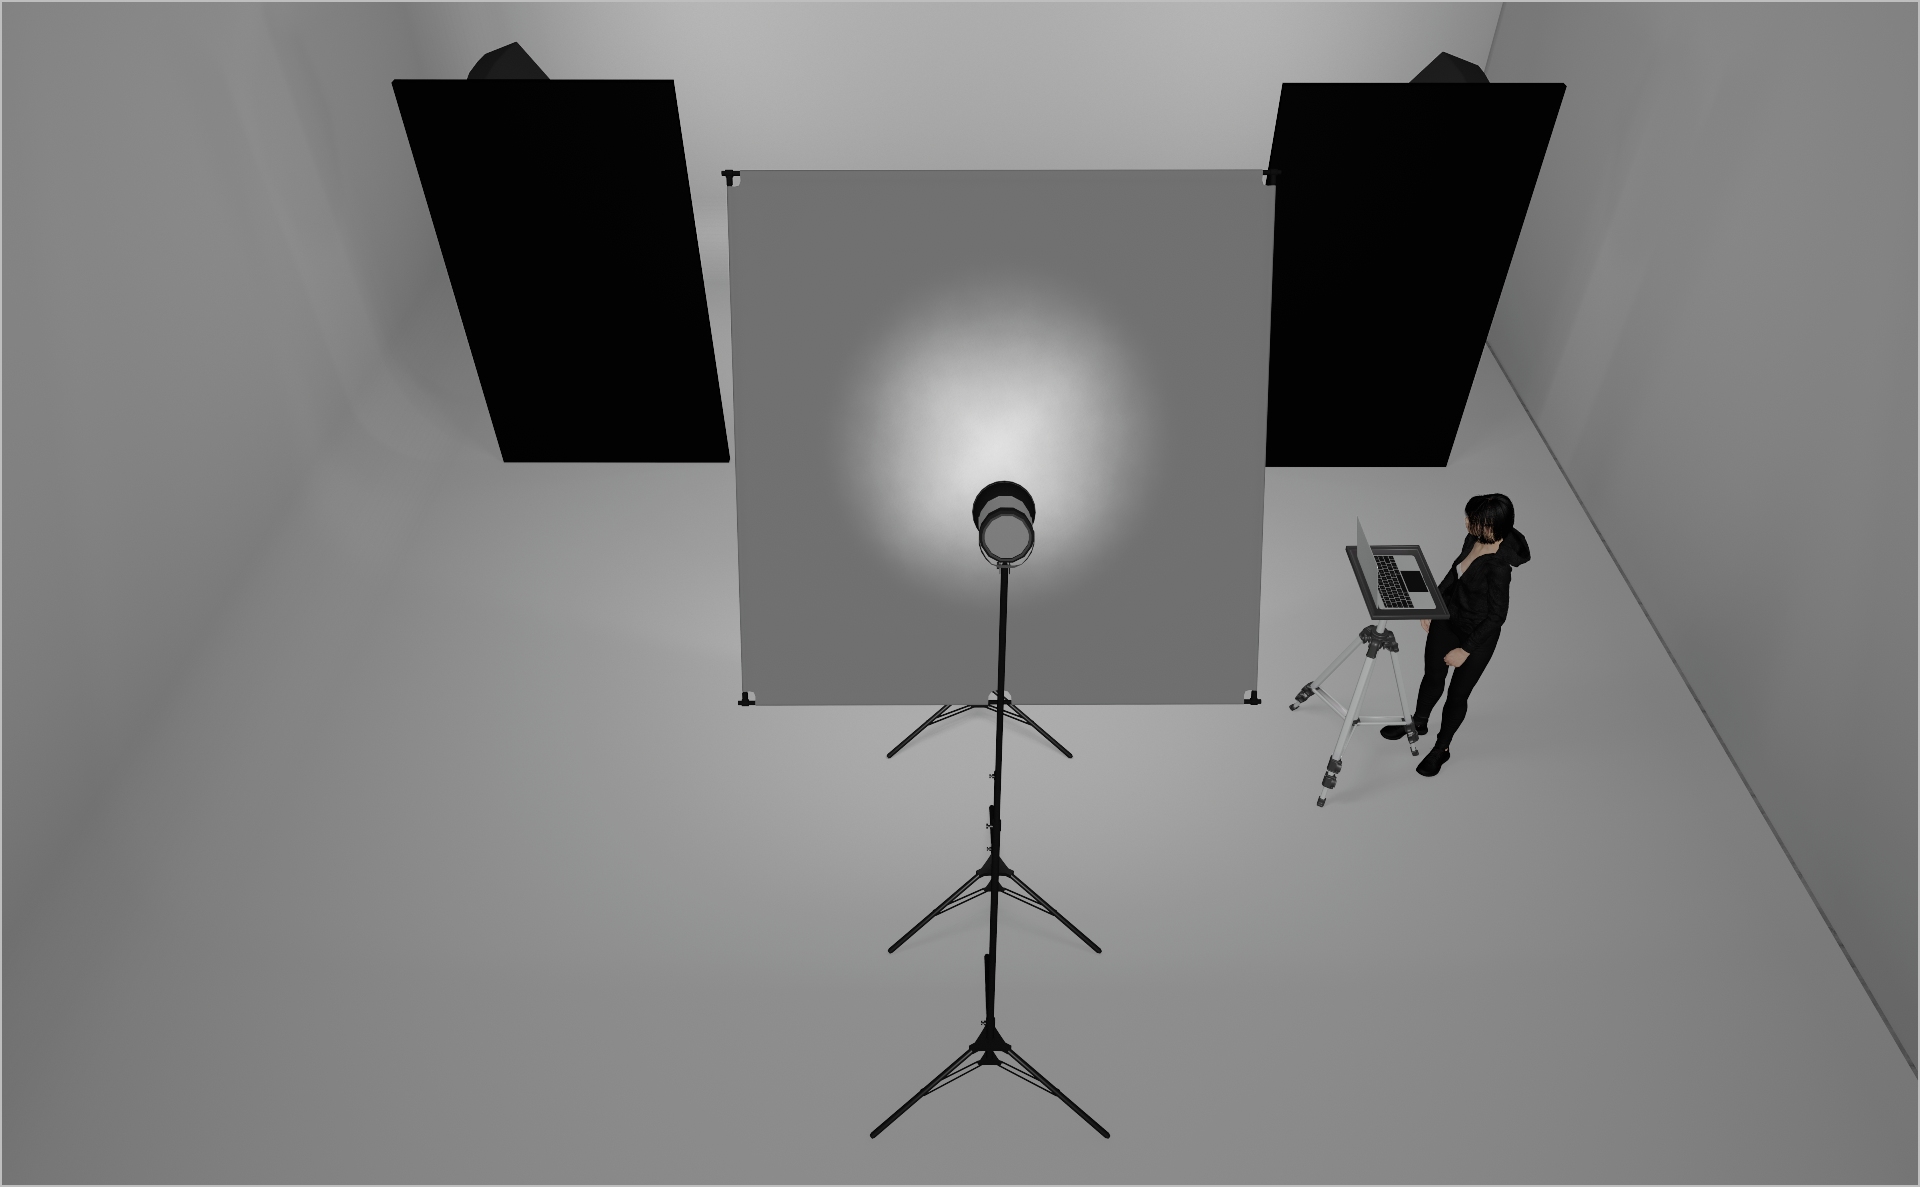
STEP 2
- Mount a 6×6 frame with 6×6 grid cloth, centered behind the camera.
- Place a Profoto ProHead with Zoom Reflector directly behind the grid, aiming through it.
- Use this as ambient fill to lift subtle shadows on the model’s face.
- Start at power 4.0 and tweak to taste.

STEP 3
- Mount two Profoto White Medium umbrellas at the back to evenly wash the backdrop with soft light.
- Flag each with a black polyboard behind to block spill into the set.
- Start at power 5.0 and tweak until the background feels uniformly lit.
- Camera settings: 1/160 s, ƒ/11, ISO 160.
PROJECT DETAILS
CRAFTING THE LIGHT
Project Intro
The goal of this setup is to create a punchy, glowy beauty light that works very well for commercial shoots as well as beauty editorials. Let`s dive in!
BEFORE AND AFTER
Transformation made visible.
STEP 1
- Mount your Beauty Dish (Profoto Softlight Reflector White) above the camera.
- Tilt it roughly 40° down toward the model for that signature beauty-light look—smooth midtones, crisp highlights. This is your key-light.
- Add a small white polyboard under the model’s chin to soften any harsh shadows.
- Start at power 6.0 and tweak to taste.
STEP 2
- Mount a 6×6 frame with 6×6 grid cloth, centered behind the camera.
- Place a Profoto ProHead with Zoom Reflector directly behind the grid, aiming through it.
- Use this as ambient fill to lift subtle shadows on the model’s face.
- Start at power 4.0 and tweak to taste.
STEP 3
- Mount two Profoto White Medium umbrellas at the back to evenly wash the backdrop with soft light.
- Flag each with a black polyboard behind to block spill into the set.
- Start at power 5.0 and tweak until the background feels uniformly lit.
- Camera settings: 1/160 s, ƒ/11, ISO 160.
BEFORE AND AFTER
A closer look at professional environments.
TOOLS
Equipment List
Profoto Air Remote
A wireless transmitter that mounts on the camera’s hot shoe to control Profoto lights remotely. Supports TTL, manual power adjustment, and high-speed sync. Why it’s used: Enables precise, cable-free control of flash settings from the camera position, streamlining workflow and allowing quick lighting adjustments during a shoot.

A wireless transmitter that mounts on the camera’s hot shoe to control Profoto lights remotely. Supports TTL, manual power adjustment, and high-speed sync. Why it’s used: Enables precise, cable-free control of flash settings from the camera position, streamlining workflow and allowing quick lighting adjustments during a shoot.
Profoto Pro 11
A top-tier 2400 Ws studio generator offering ultra-fast flash durations, short recycle times, and exceptional color consistency. Features wireless control and AirX connectivity for remote operation.
Why it’s used: Delivers unmatched speed, power, and reliability for high-end fashion, beauty, and commercial shoots where precision and performance are critical.
A top-tier 2400 Ws studio generator offering ultra-fast flash durations, short recycle times, and exceptional color consistency. Features wireless control and AirX connectivity for remote operation.
Why it’s used: Delivers unmatched speed, power, and reliability for high-end fashion, beauty, and commercial shoots where precision and performance are critical.
Profoto ProHead
A high-performance flash head designed for use with Profoto’s Pro-series generators. Built for durability, fast recycling, and consistent color output, even at high power.
Why it’s used: Delivers powerful, reliable lighting for demanding studio and location work, supporting a wide range of Profoto modifiers for maximum creative control.
A high-performance flash head designed for use with Profoto’s Pro-series generators. Built for durability, fast recycling, and consistent color output, even at high power.
Why it’s used: Delivers powerful, reliable lighting for demanding studio and location work, supporting a wide range of Profoto modifiers for maximum creative control.
Profoto Extension Cable
A heavy-duty cable that extends the distance between a Profoto generator and its flash head. Designed to handle high power loads without loss of performance.
Why it’s used: Provides flexibility in light placement on large sets or challenging locations, allowing equipment to be positioned safely and creatively without being limited by generator proximity.
A heavy-duty cable that extends the distance between a Profoto generator and its flash head. Designed to handle high power loads without loss of performance.
Why it’s used: Provides flexibility in light placement on large sets or challenging locations, allowing equipment to be positioned safely and creatively without being limited by generator proximity.
Profoto Zoom Reflector
A versatile hard light modifier for Profoto flash heads, featuring an adjustable zoom function to change the beam spread from wide to focused.
Why it’s used: Provides crisp, punchy light with controllable spread, making it suitable for everything from general illumination to accent lighting in both studio and location work.
A versatile hard light modifier for Profoto flash heads, featuring an adjustable zoom function to change the beam spread from wide to focused.
Why it’s used: Provides crisp, punchy light with controllable spread, making it suitable for everything from general illumination to accent lighting in both studio and location work.
Profoto Umbrella Shallow White M
A medium-sized, shallow-profile umbrella with a white interior for soft, even light. Designed for quick setup and portability.
Why it’s used: Produces a flattering, diffused light with gentle contrast, ideal for portraits, beauty, and fashion shoots where a natural, soft look is desired.
Profoto Umbrella Shallow White M
A medium-sized, shallow-profile umbrella with a white interior for soft, even light. Designed for quick setup and portability.
Why it’s used: Produces a flattering, diffused light with gentle contrast, ideal for portraits, beauty, and fashion shoots where a natural, soft look is desired.
Profoto Softlight Reflector White (Beauty Dish)
A 65 cm white beauty dish designed for Profoto flash heads, producing a unique mix of soft, even light with a hint of crispness. The white interior offers a more gentle, flattering quality than silver versions.
Why it’s used: A go-to for fashion and beauty photography, delivering smooth skin tones, natural-looking highlights, and round catchlights while maintaining detail and shape.
Poly Board Black Large
A large, rigid panel made from black foam core or similar material, used to block or absorb light. Typically lightweight but sturdy enough for repeated use on set.
Why it’s used: Reduces light spill, deepens shadows, and increases contrast by preventing unwanted reflections. Commonly used in pairs to create controlled, moody lighting setups.
A large, rigid panel made from black foam core or similar material, used to block or absorb light. Typically lightweight but sturdy enough for repeated use on set.
Why it’s used: Reduces light spill, deepens shadows, and increases contrast by preventing unwanted reflections. Commonly used in pairs to create controlled, moody lighting setups.
Poly Board White Small
A small, rigid panel made from white foam core or similar material, used to reflect light. Lightweight and easy to position around the set.
Why it’s used: Bounces light back onto the subject to fill in shadows, soften contrast, and create a more even, flattering illumination.
A small, rigid panel made from white foam core or similar material, used to reflect light. Lightweight and easy to position around the set.
Why it’s used: Bounces light back onto the subject to fill in shadows, soften contrast, and create a more even, flattering illumination.
Grid Cloth
A durable, reinforced fabric with an embedded grid pattern, available in various densities from full to half-stop diffusion. Often mounted on frames or used as large overheads.
Why it’s used: Softens and spreads light while maintaining directional control, making it ideal for creating smooth, even illumination without excessive light spill.
A durable, reinforced fabric with an embedded grid pattern, available in various densities from full to half-stop diffusion. Often mounted on frames or used as large overheads.
Why it’s used: Softens and spreads light while maintaining directional control, making it ideal for creating smooth, even illumination without excessive light spill.
Here you´ll find everything to elevate your career
UNLOCKED
Capture One Styles
MEMBER-EXCLUSIVE OFFERING
Mentoring
Rotate your device to see the content